Repotting Succulents: When and How to Do It Right

Succulents are beloved for their beauty, resilience, and ability to thrive with minimal care, making them a favorite among plant enthusiasts of all levels. However, like all living things, succulents need the right support to grow. One often-overlooked aspect of succulent care is repotting. Knowing when and how to repot your succulents can make a significant difference in their overall health and vibrancy.
This guide will walk you through why succulents need to be repotted, how to know it’s time, and the step-by-step process to do it right.
Why Do Succulents Need to Be Repotted?
Contrary to their hardy appearance, succulents thrive best when their unique needs are met. Repotting is an essential aspect of their care for several reasons:
- Fresh Growing Medium: Over time, soil becomes compacted and loses nutrients, which can hinder the succulent’s growth. Repotting provides fresh, nutrient-rich soil.
- Root Health: Succulents can become root-bound, where their roots outgrow the pot and circle around themselves. This can suffocate the plant and stifle growth.
- Drainage Issues: Improper drainage is a leading cause of succulent struggles. Repotting allows you to choose a pot with proper drainage holes and fresh soil that facilitates water flow.
- Pest Prevention: Old soil can become a breeding ground for pests like fungus gnats. Repotting reduces the risk of infestations.
How to Know When It’s Time to Repot
Repotting succulents isn’t needed often, but there are clear signs to watch for. Here’s how to tell if it’s time:
- Outgrown Pot: If your succulent’s roots are poking through the drainage holes or growing above the soil’s surface, the plant has outgrown its home.
- Stunted Growth: A healthy succulent should show signs of growth during its active season. If it’s remained stagnant for months, cramped roots or depleted soil may be the culprit.
- Water Retention Problems: If water pools on the soil surface or drains too quickly, the soil may be compacted or degraded.
- Purchased Recently: Many store-bought succulents are planted in poor-quality soil. For optimal health, repot them soon after bringing them home.
- Pests or Mold: Visible pests, mold, or unusual odors in the soil are strong indicators that it’s time for a change.
The Best Time to Repot Succulents
Timing is crucial when repotting succulents. Aim to repot during the plant’s active growing season, which is typically in spring or early summer. This allows the succulent to recover and adapt to its new environment before entering dormancy.
Avoid repotting during extreme weather conditions or when the plant is flowering. Repotting during these times can stress the succulent and impact its growth.
Step-by-Step Guide to Repotting Succulents
Repotting a succulent is straightforward, as long as you follow these steps carefully.
Step 1: Choose the Right Pot
- Material: Terracotta or ceramic pots are preferred for their breathability, which helps prevent overwatering.
- Size: Select a pot that’s slightly larger than your succulent, leaving about half an inch of extra space around the edges.
- Drainage: Ensure the pot has drainage holes to prevent waterlogging.
Step 2: Select the Right Soil
Succulents need well-draining soil to thrive. Look for a cactus and succulent potting mix, or make your own by mixing 2 parts sand, 2 parts potting soil, and 1 part perlite.
Step 3: Prepare the Plant
- Stop watering your succulent a few days before repotting. Dry soil makes the plant easier to handle and reduces the risk of damage.
- Remove the succulent from its current pot gently. If the soil is compacted, loosen it carefully with your hands.
Step 4: Inspect the Roots
- Check for root rot, which appears as mushy, brown roots. Trim any unhealthy roots with sterilized scissors.
- Remove excess soil from the root ball to promote new growth in the fresh soil.
Step 5: Repot Your Succulent
- Fill the new pot with fresh soil, leaving enough room for the plant’s root ball.
- Position the succulent in the center of the pot and cover the roots with soil. Tap the pot gently to eliminate air pockets.
Step 6: Water Strategically
Wait at least 4–7 days after repotting before watering. This gives the roots time to heal and reduces the risk of rot. When you do water, soak the soil thoroughly, and allow it to drain completely.
Helpful Tips for Long-Term Succulent Care
- Light: Most succulents thrive in bright, indirect sunlight for at least 6 hours a day. Gradually acclimate your plant to any change in its light environment after repotting.
- Water: Follow the “soak and dry” method, easily allowing soil to dry out completely between waterings.
- Pest Control: Watch for signs of pests like mealybugs. A simple mixture of water and rubbing alcohol can be sprayed to remove pests.
Why Proper Repotting Makes All the Difference
Repotting isn’t just about aesthetics or providing a larger pot. It’s a vital step in maintaining your succulent's health and ensuring it thrives long-term. By understanding when to repot and how to do it correctly, you’re giving your succulent the best chance to grow, flourish, and brighten your space for years to come.
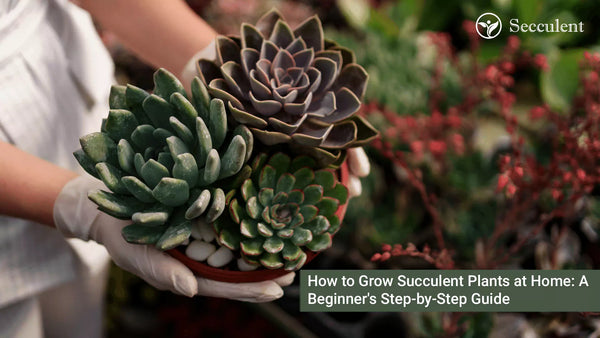
Whether you’re cultivating a single Echeveria or creating a vibrant display of mixed varieties, keeping your succulents in top condition starts with proper care.
Final Thoughts: Your Succulent Care Journey
Properly repotting succulents is one of the most beneficial things you can do for their health. Now that you understand the importance of timing and the steps involved, you’re ready to give your plants the care they deserve.
If you’re looking for more tips on succulent care or advice on which varieties to add to your collection, subscribe to our newsletter for expert insights and inspiration. Happy planting!


